This project was inspired by a recent experience of trying a toy custom for the first time. This was a hobby I first discovered on YouTube - artists will take a pre-existing doll (Barbie, Monster High, etc.) and transform it into a art project by painting on a new face, re-rooting a new head of hair, sewing an outfit, and making accessories.
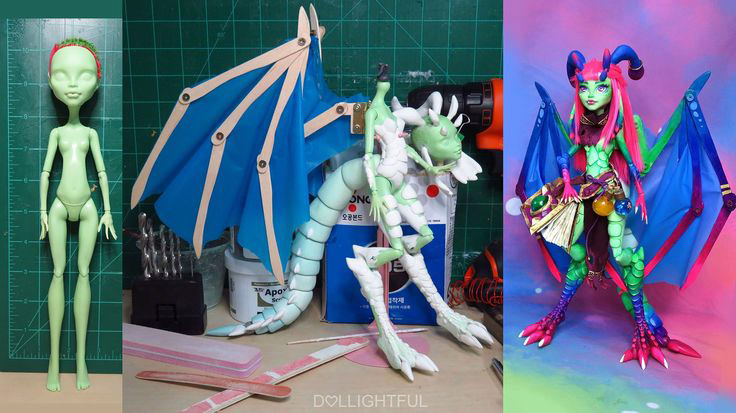
Here is an example of a doll custom from my favorite doll customizing YouTuber, Dollightful. This was from the very first doll customizing video I'd ever seen, and I was instantly drawn to the hobby. (Photo credit: Dollightful via YouTube)
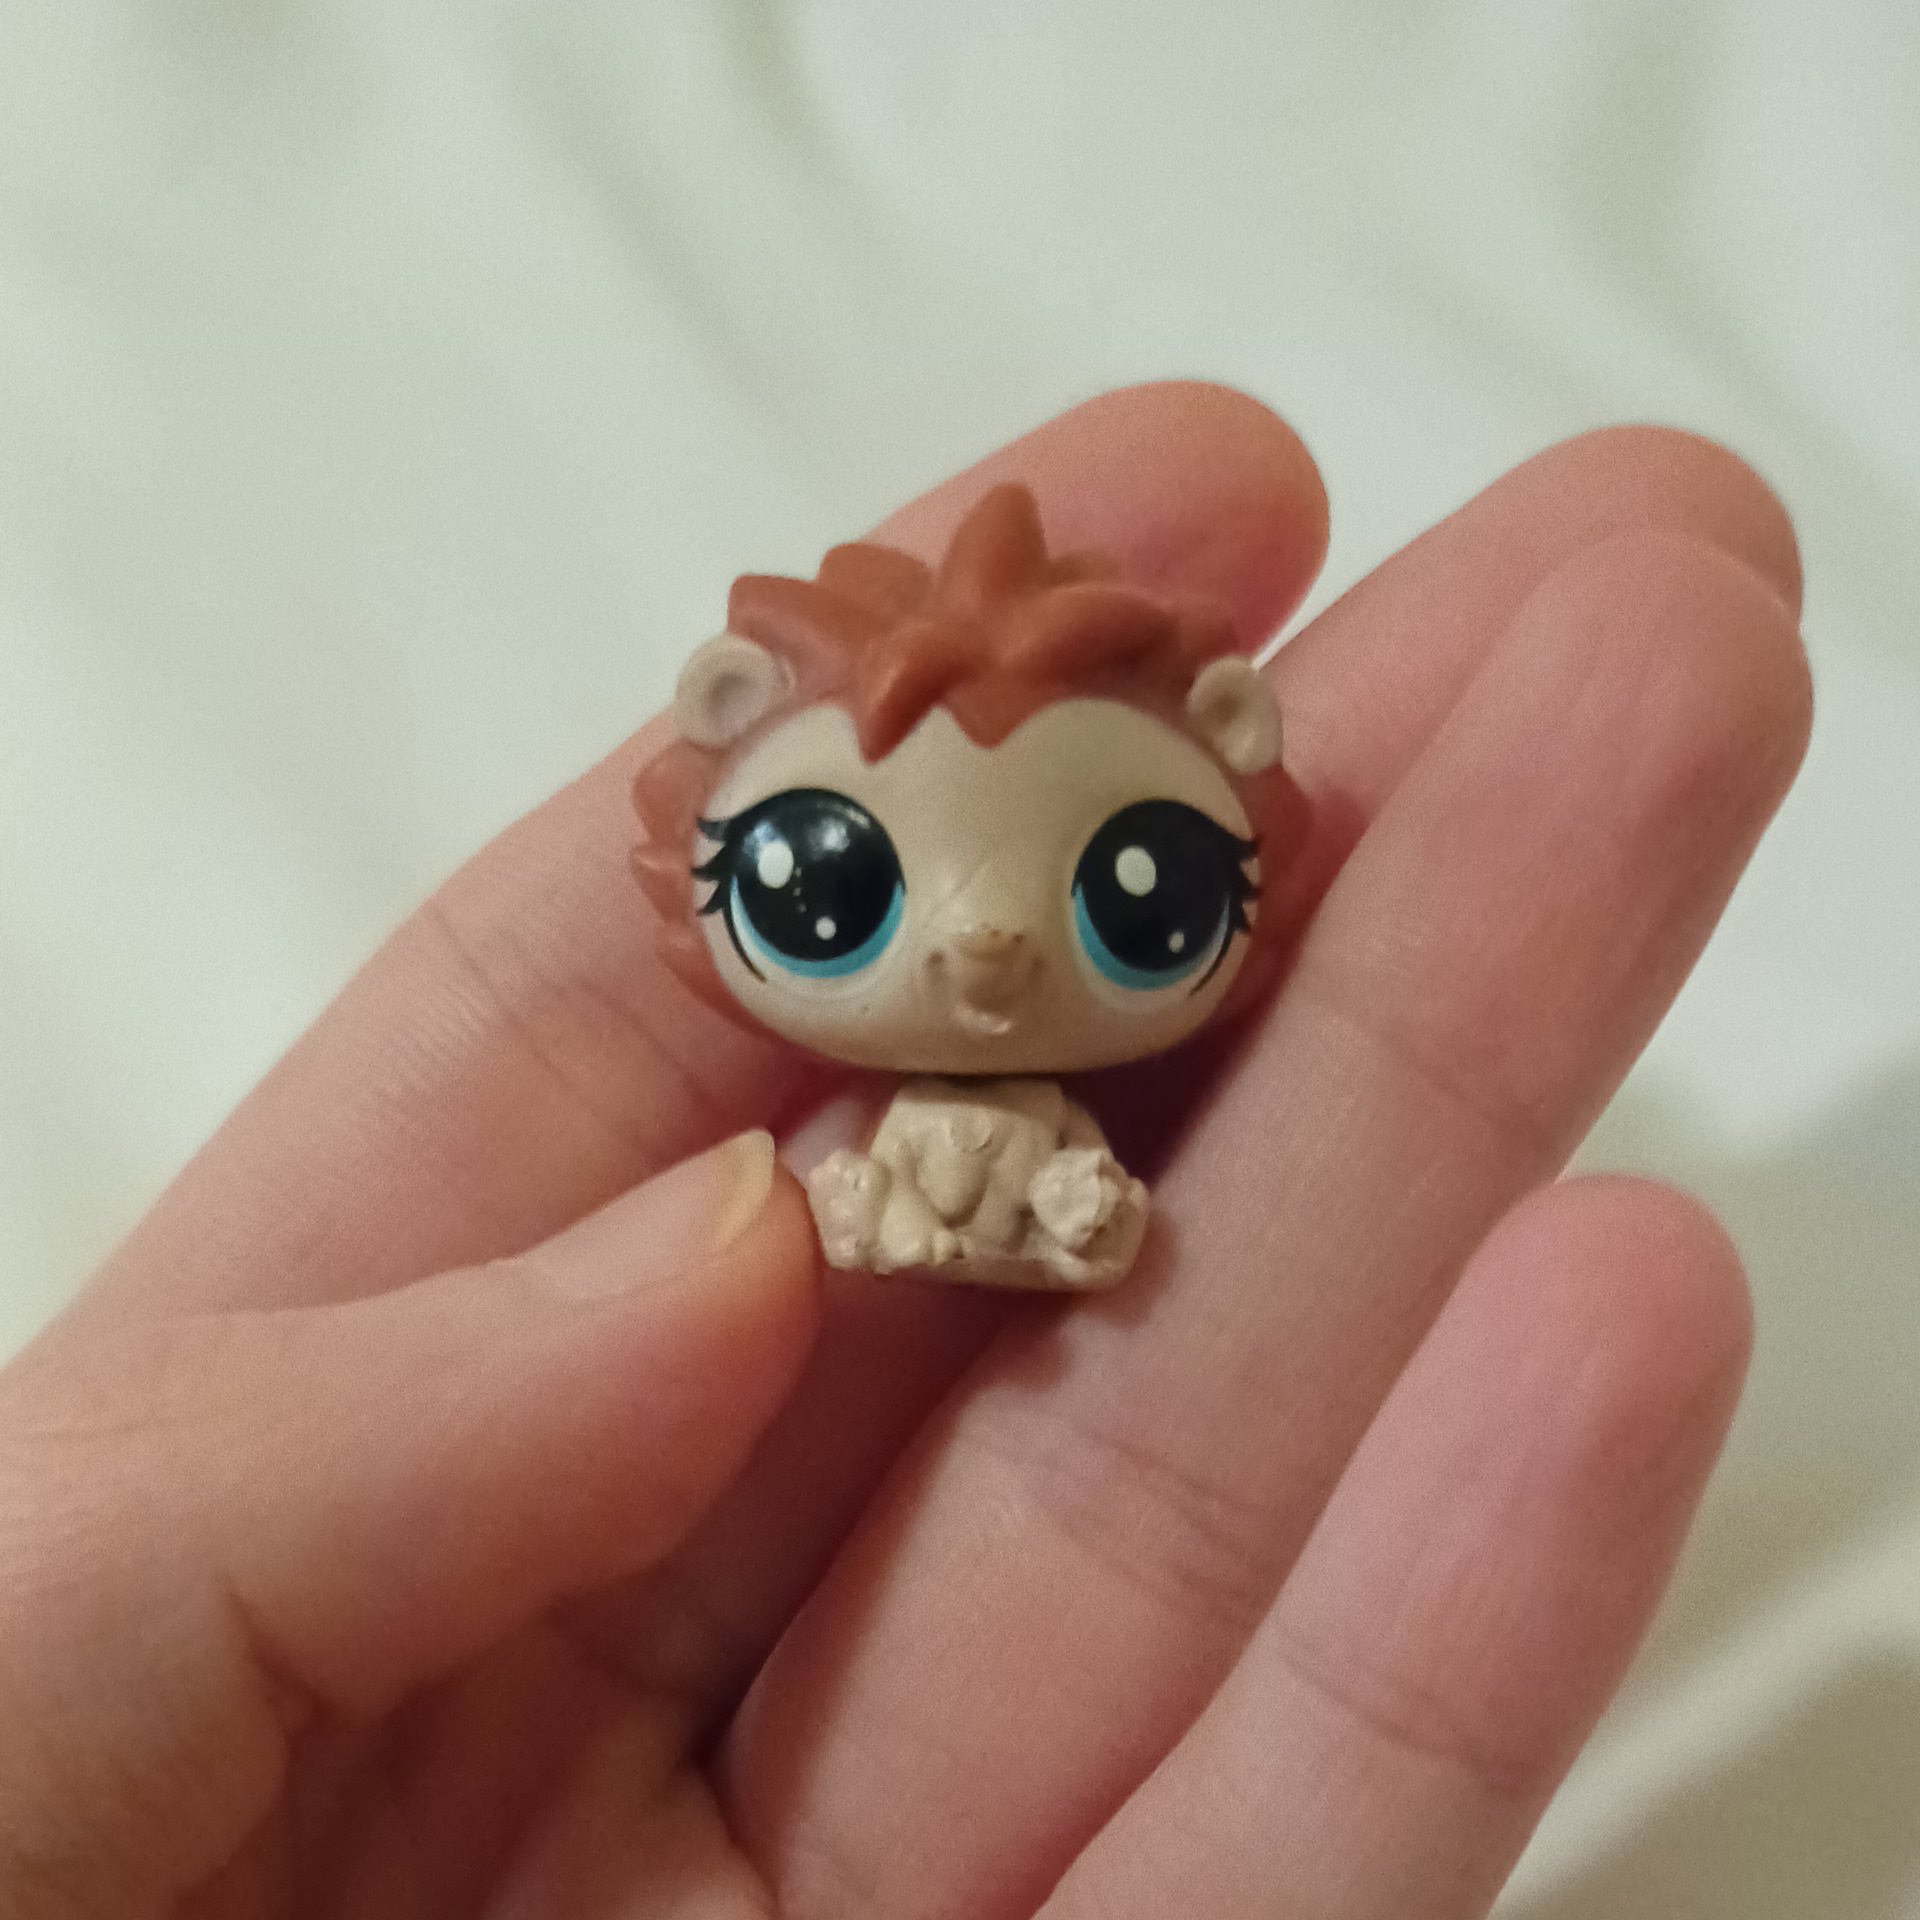
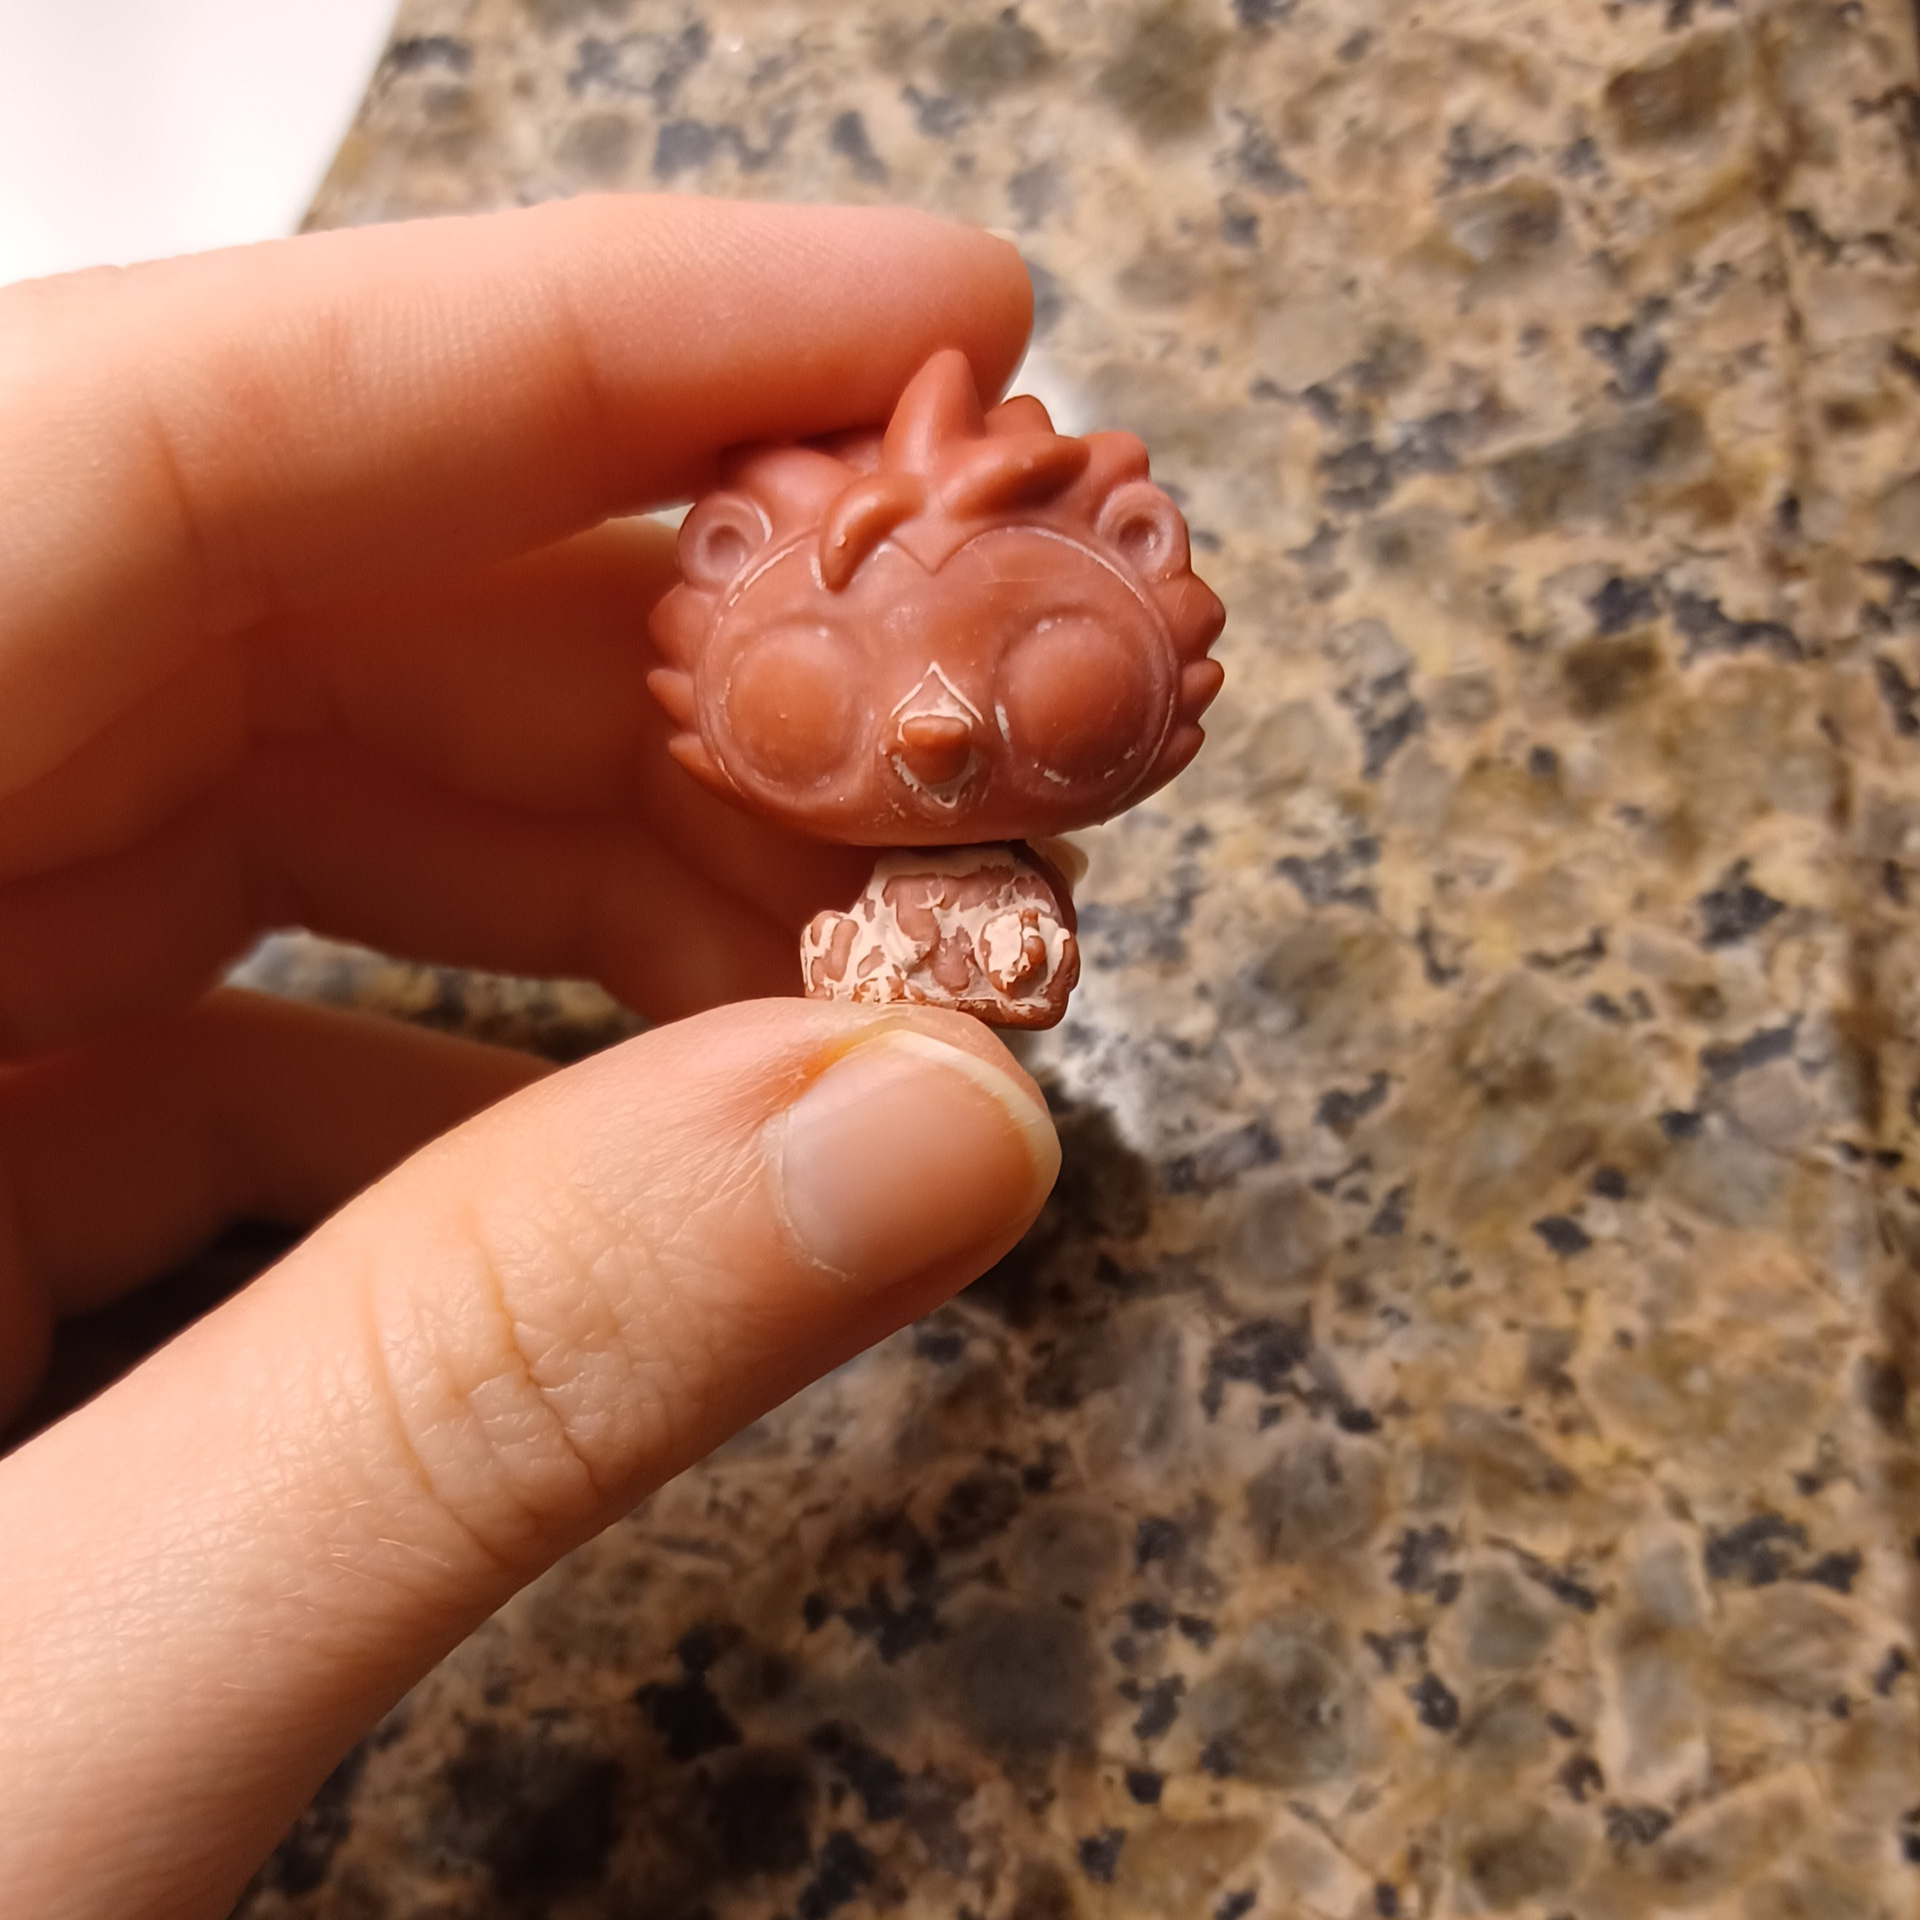
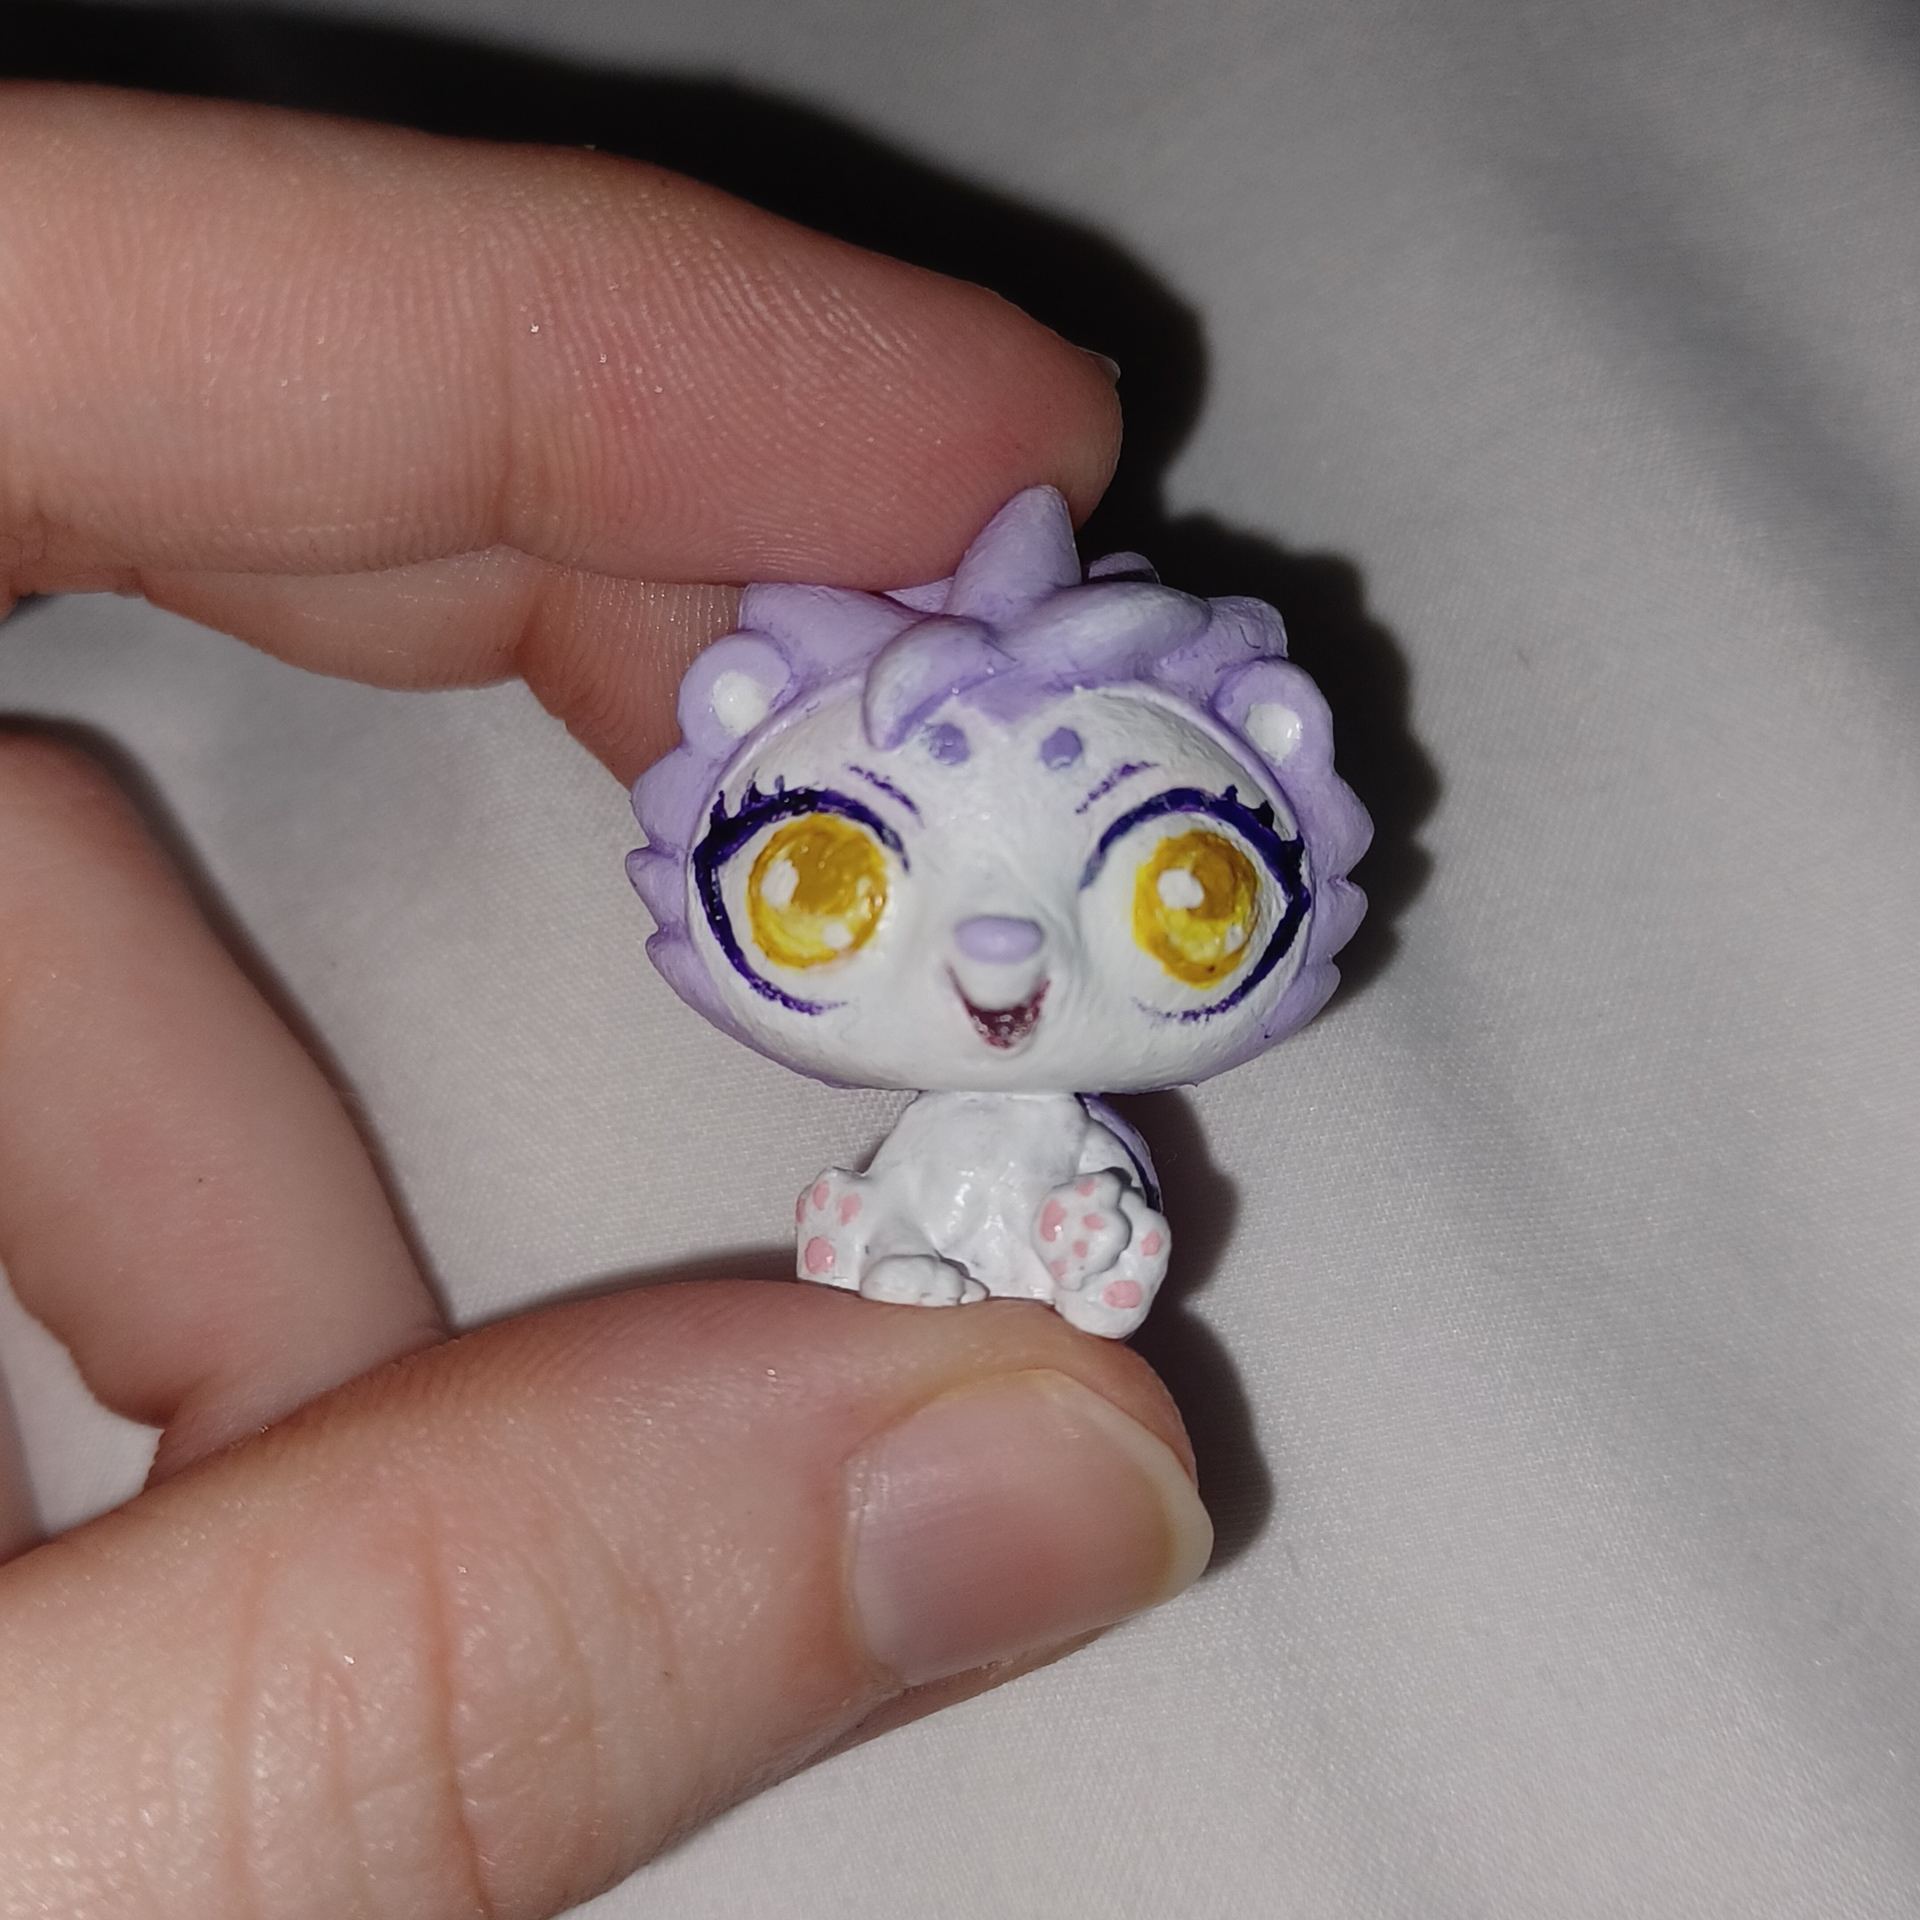
I do not have any dolls of my own, so I improvised with this small figurine toy of what appears to be a porcupine or hedgehog. I followed the steps that customizers use to repaint the face: wipe clean with acetone, use a base of gesso as primer, and use acrylic paint to paint on eyes, eyelashes, and eyebrows. It was admittedly difficult working on such a small scale (this figurine is no more than an inch and a half tall), but it was still such a fun challenge.
I wanted to take this experience and create something so that others can also enjoy the joys of toy customizing. My idea was to make a step-by-step guidebook for toy customizing, as well as a kit for storing customs.
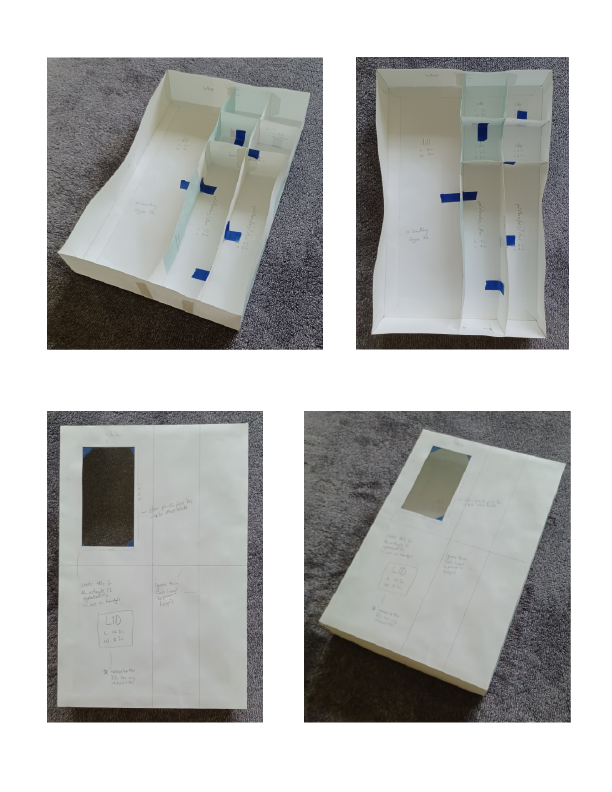

The storage container has several different sized compartments for storing different materials. The large compartment on the left can fit a standard-sized doll, and the smaller compartments can fit other crafting materials like paintbrushes, beads, spools of thread, etc. There is a cutout where the doll's face can be seen when the box is closed.
On the left: first prototype, full size. The lid was too tight to fit properly. It was only able to close because I used flimsy printer paper. On the right: second prototype, 50% scale. Adjusted the lid size so it fits. I used the colors in the bottom tray to help differentiate the compartments while assembling the prototype, but I ended up keeping the colors in the final version.

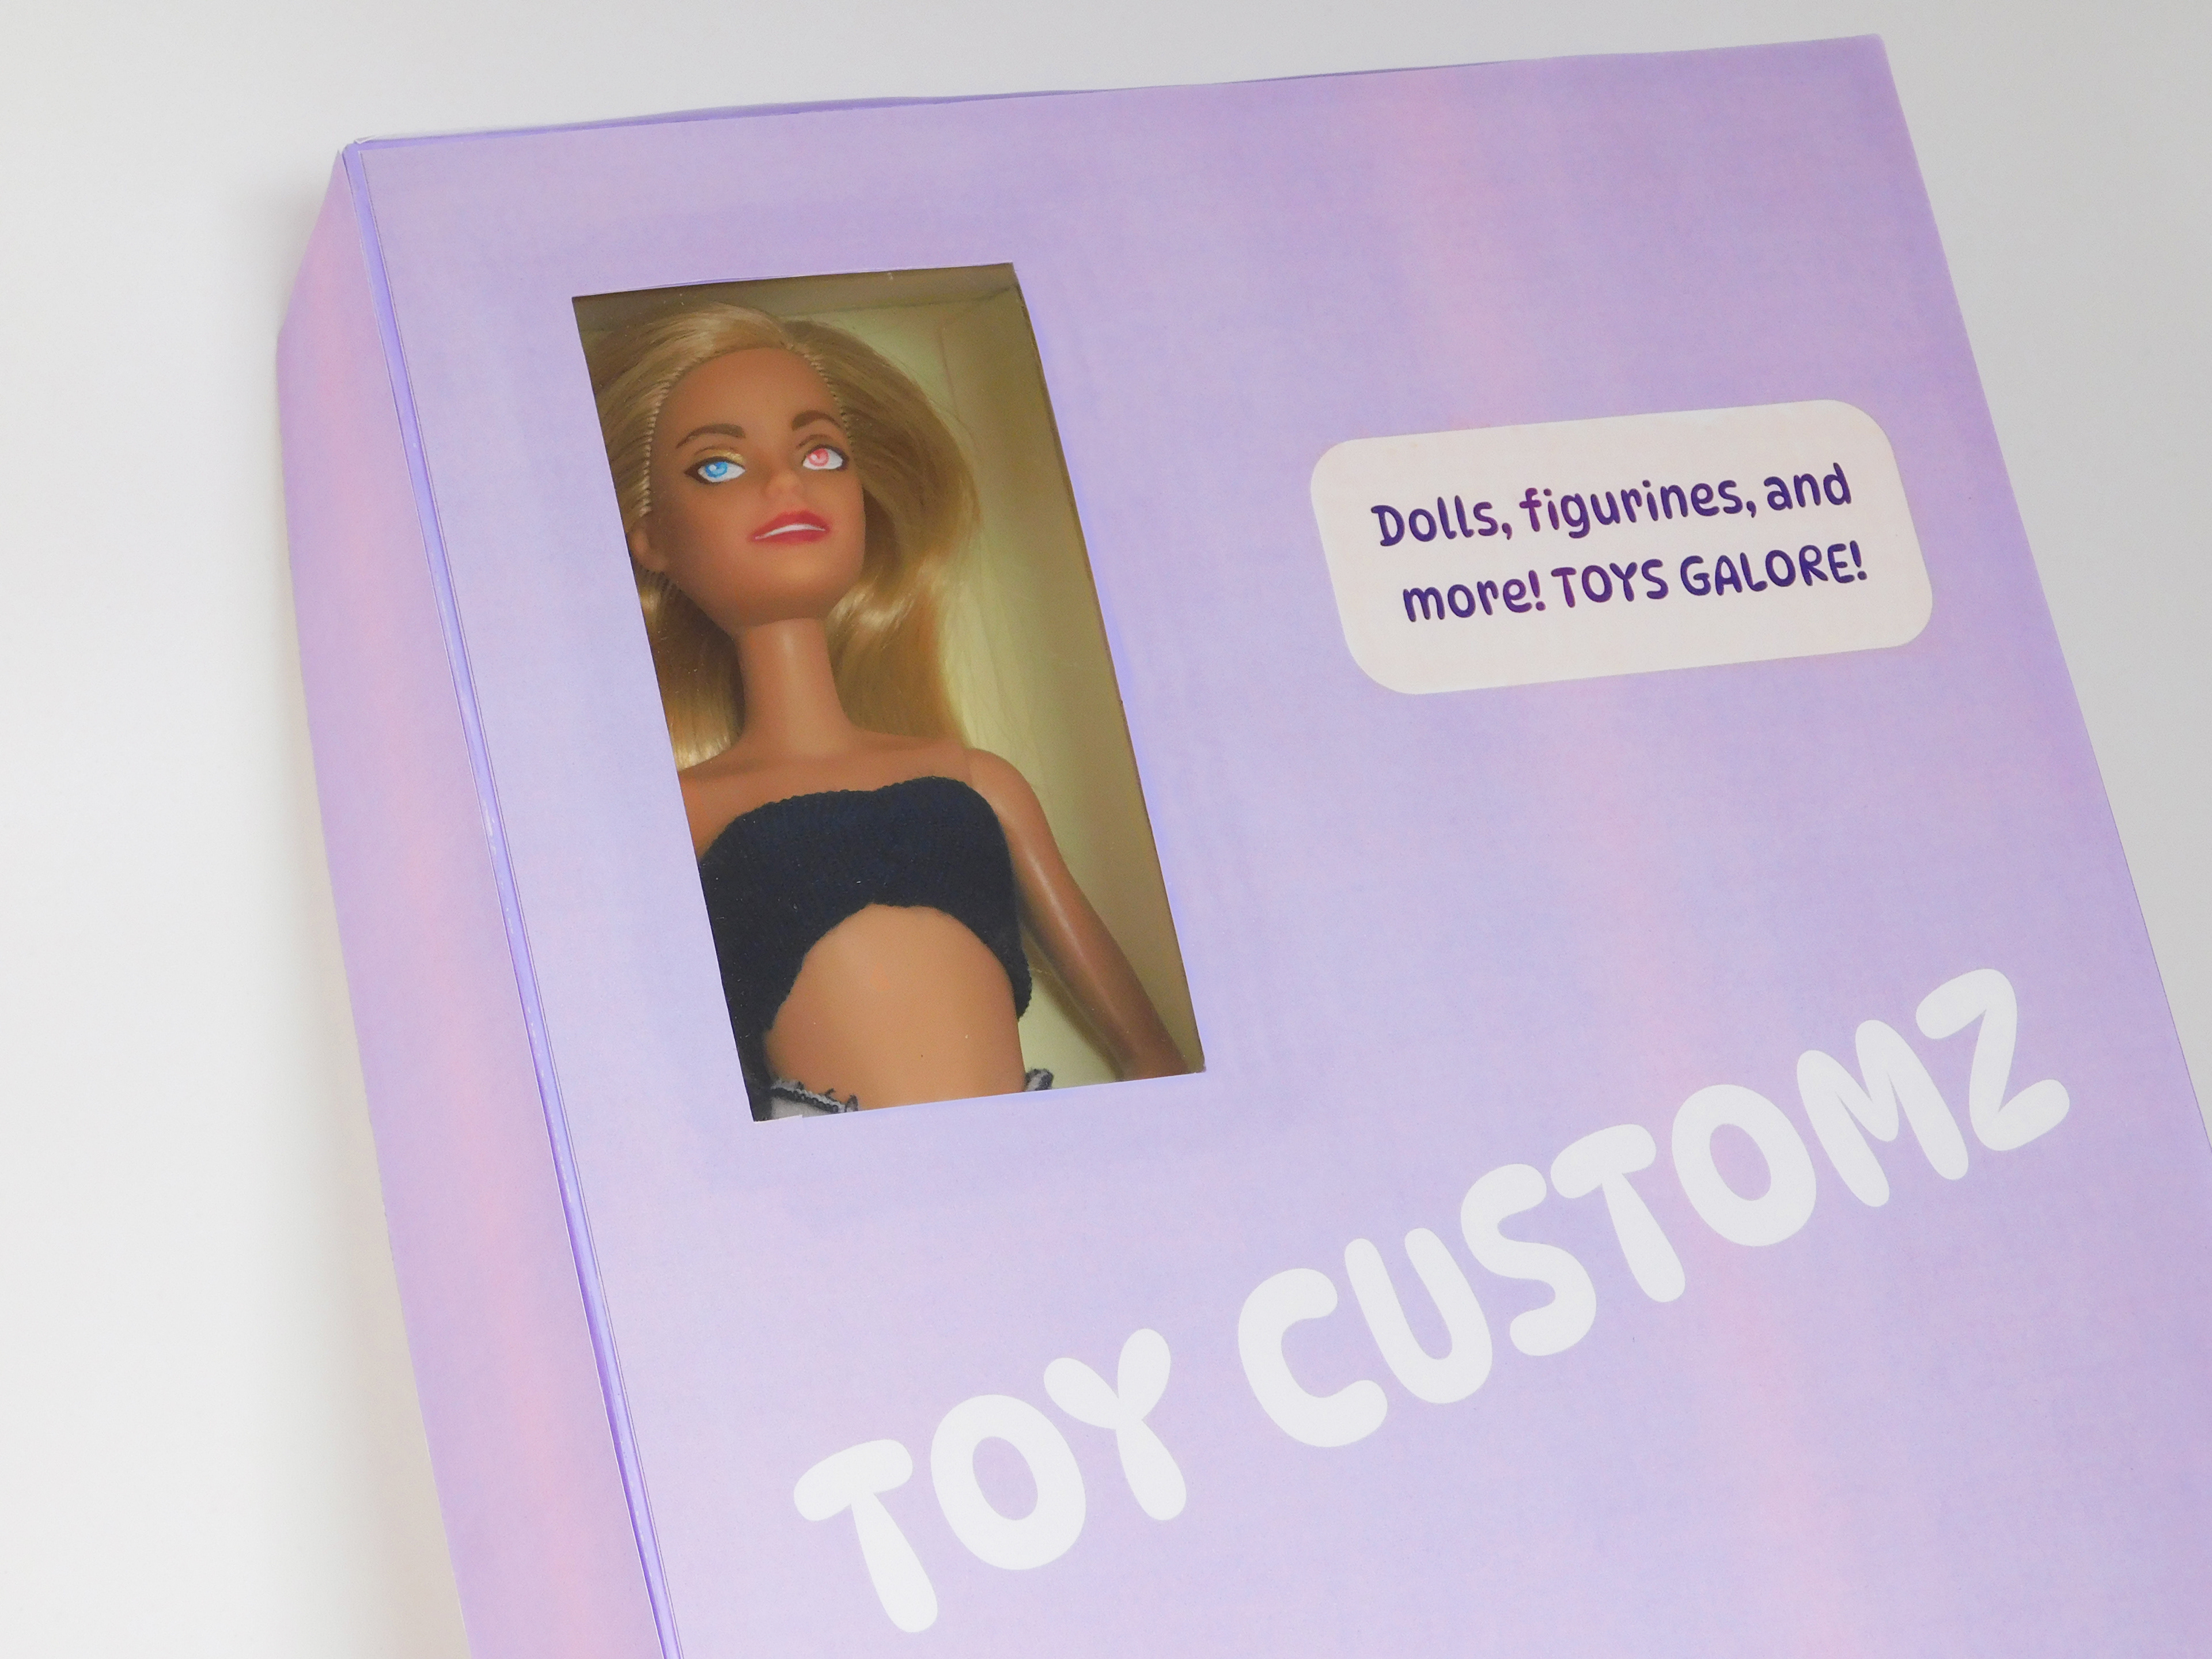
Outer lid of the box. I used a bubbly font for a playful feeling. The main colors are lavender, yellow, and white to match the toy custom that inspired the project.
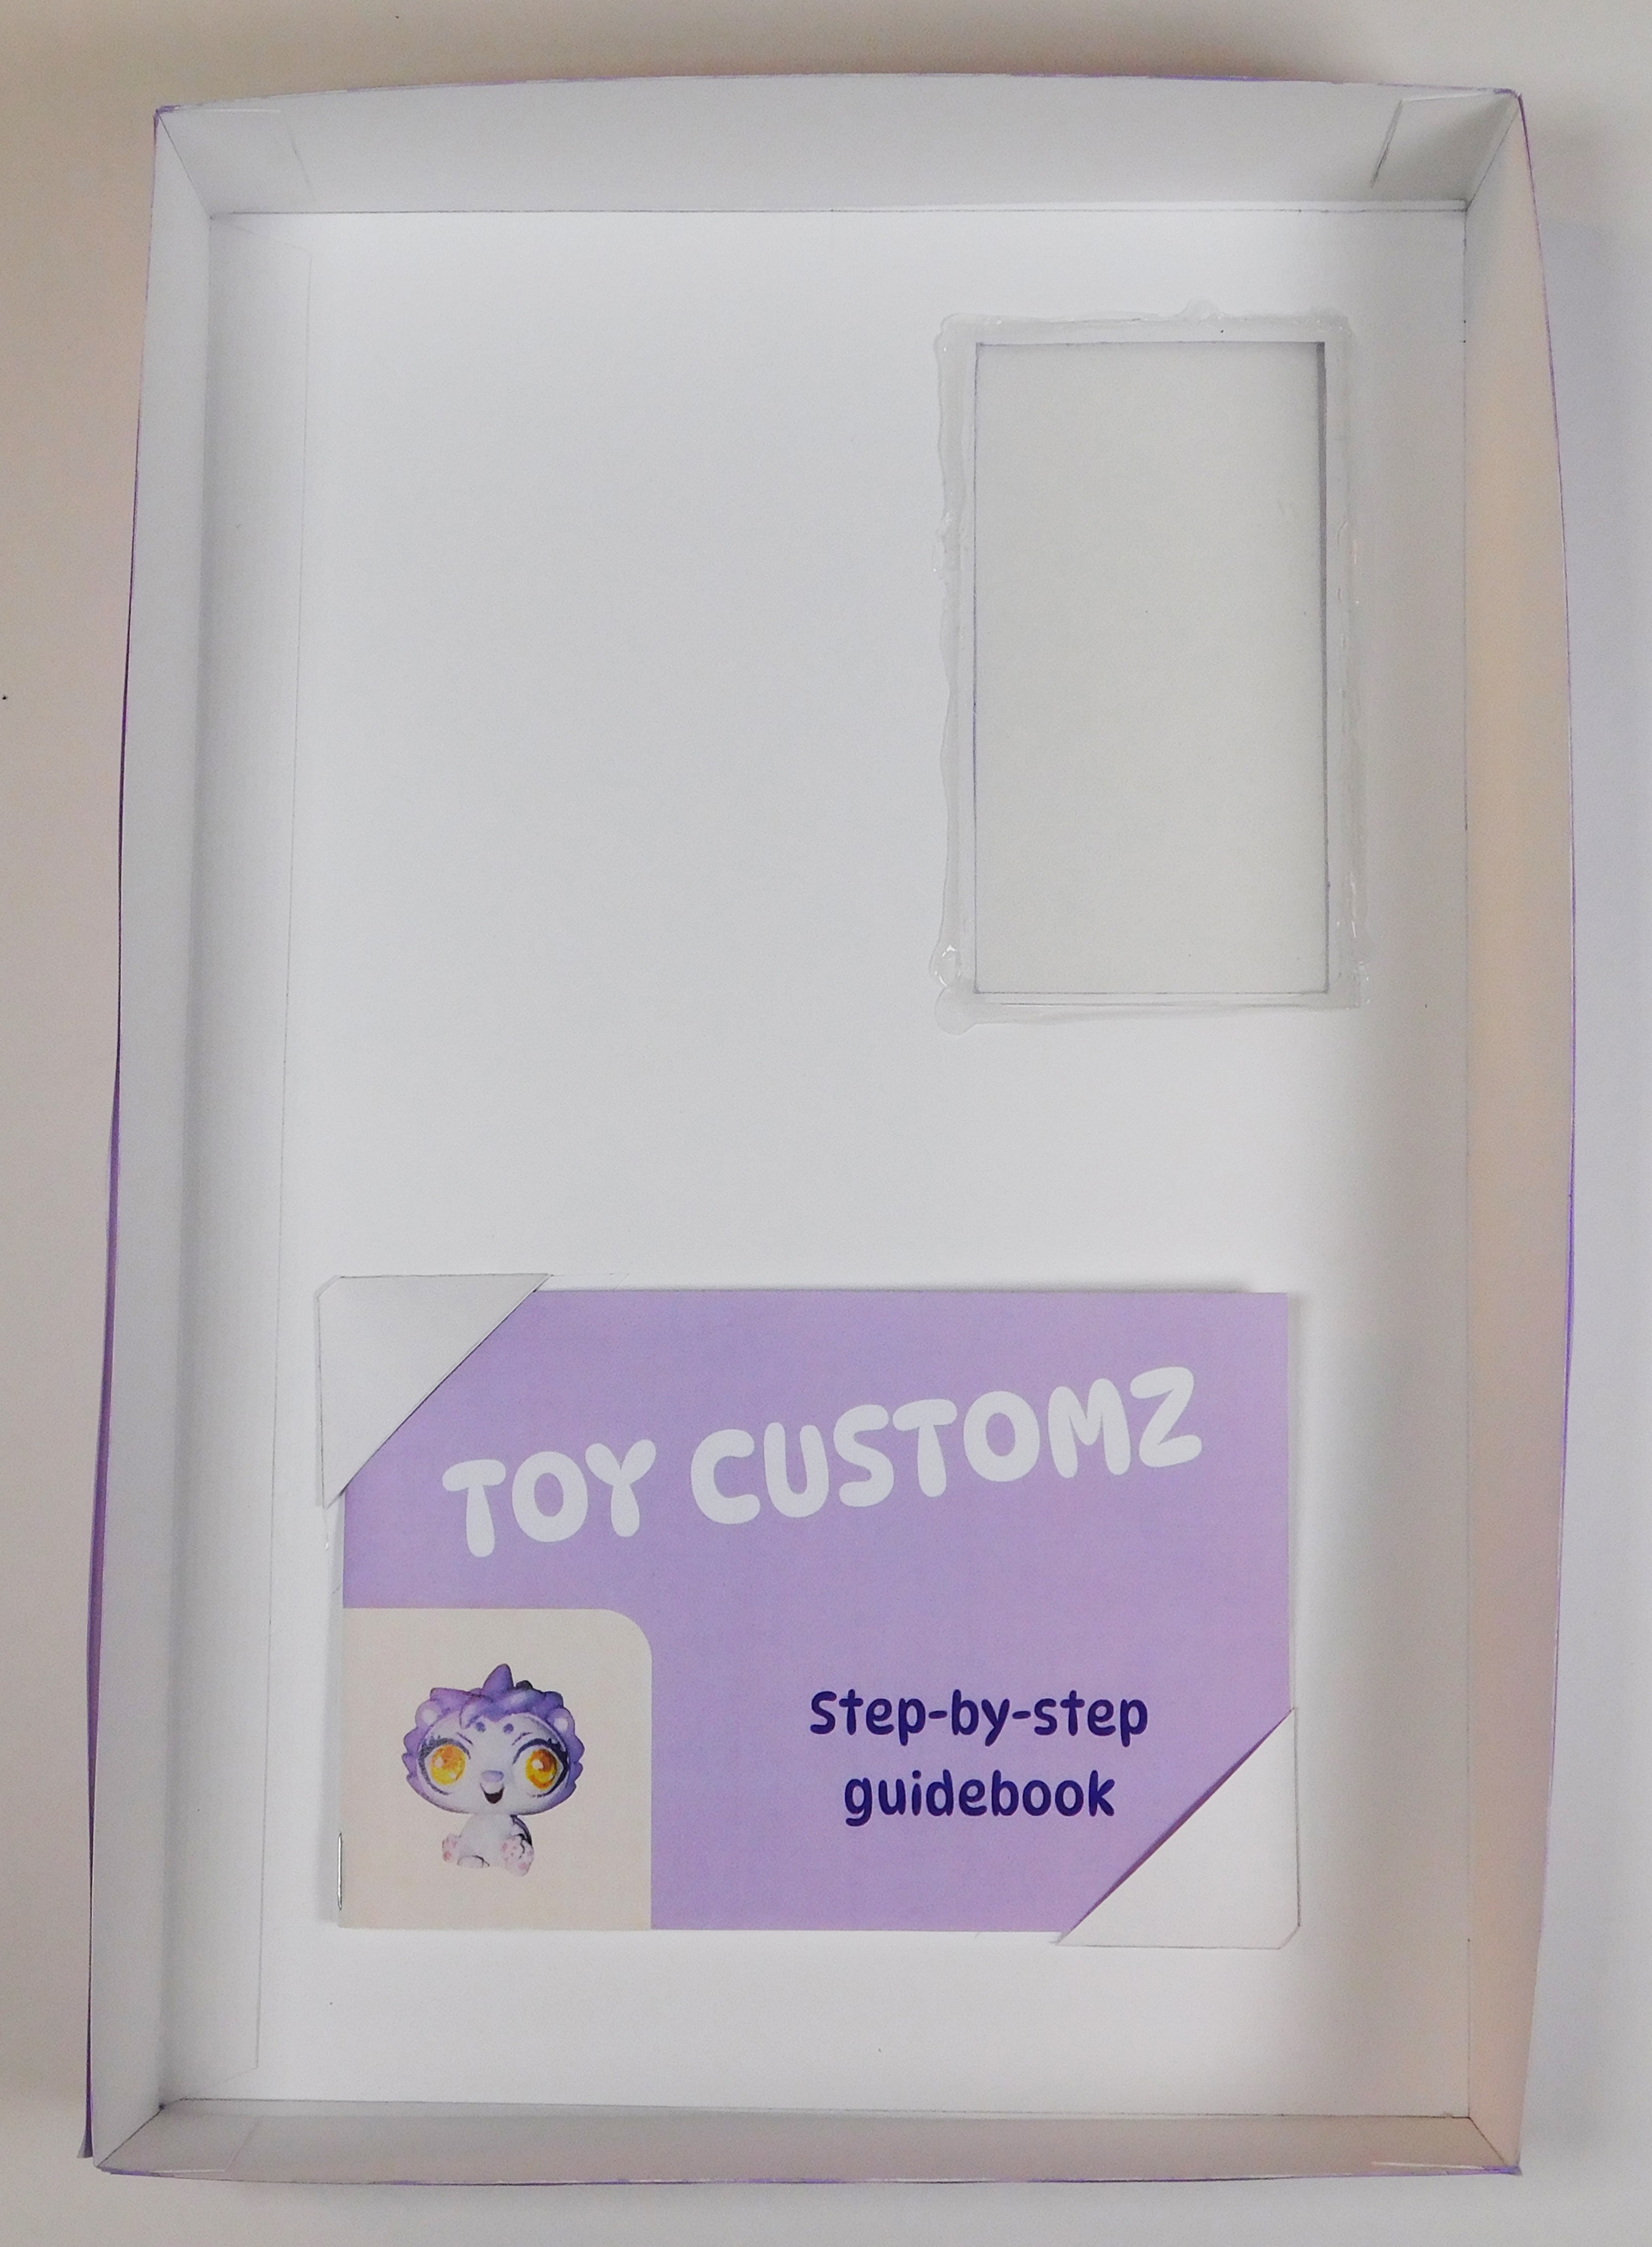
Inner pocket where the guidebook (4 inches x 6 inches) sits. Tucks into the corners.
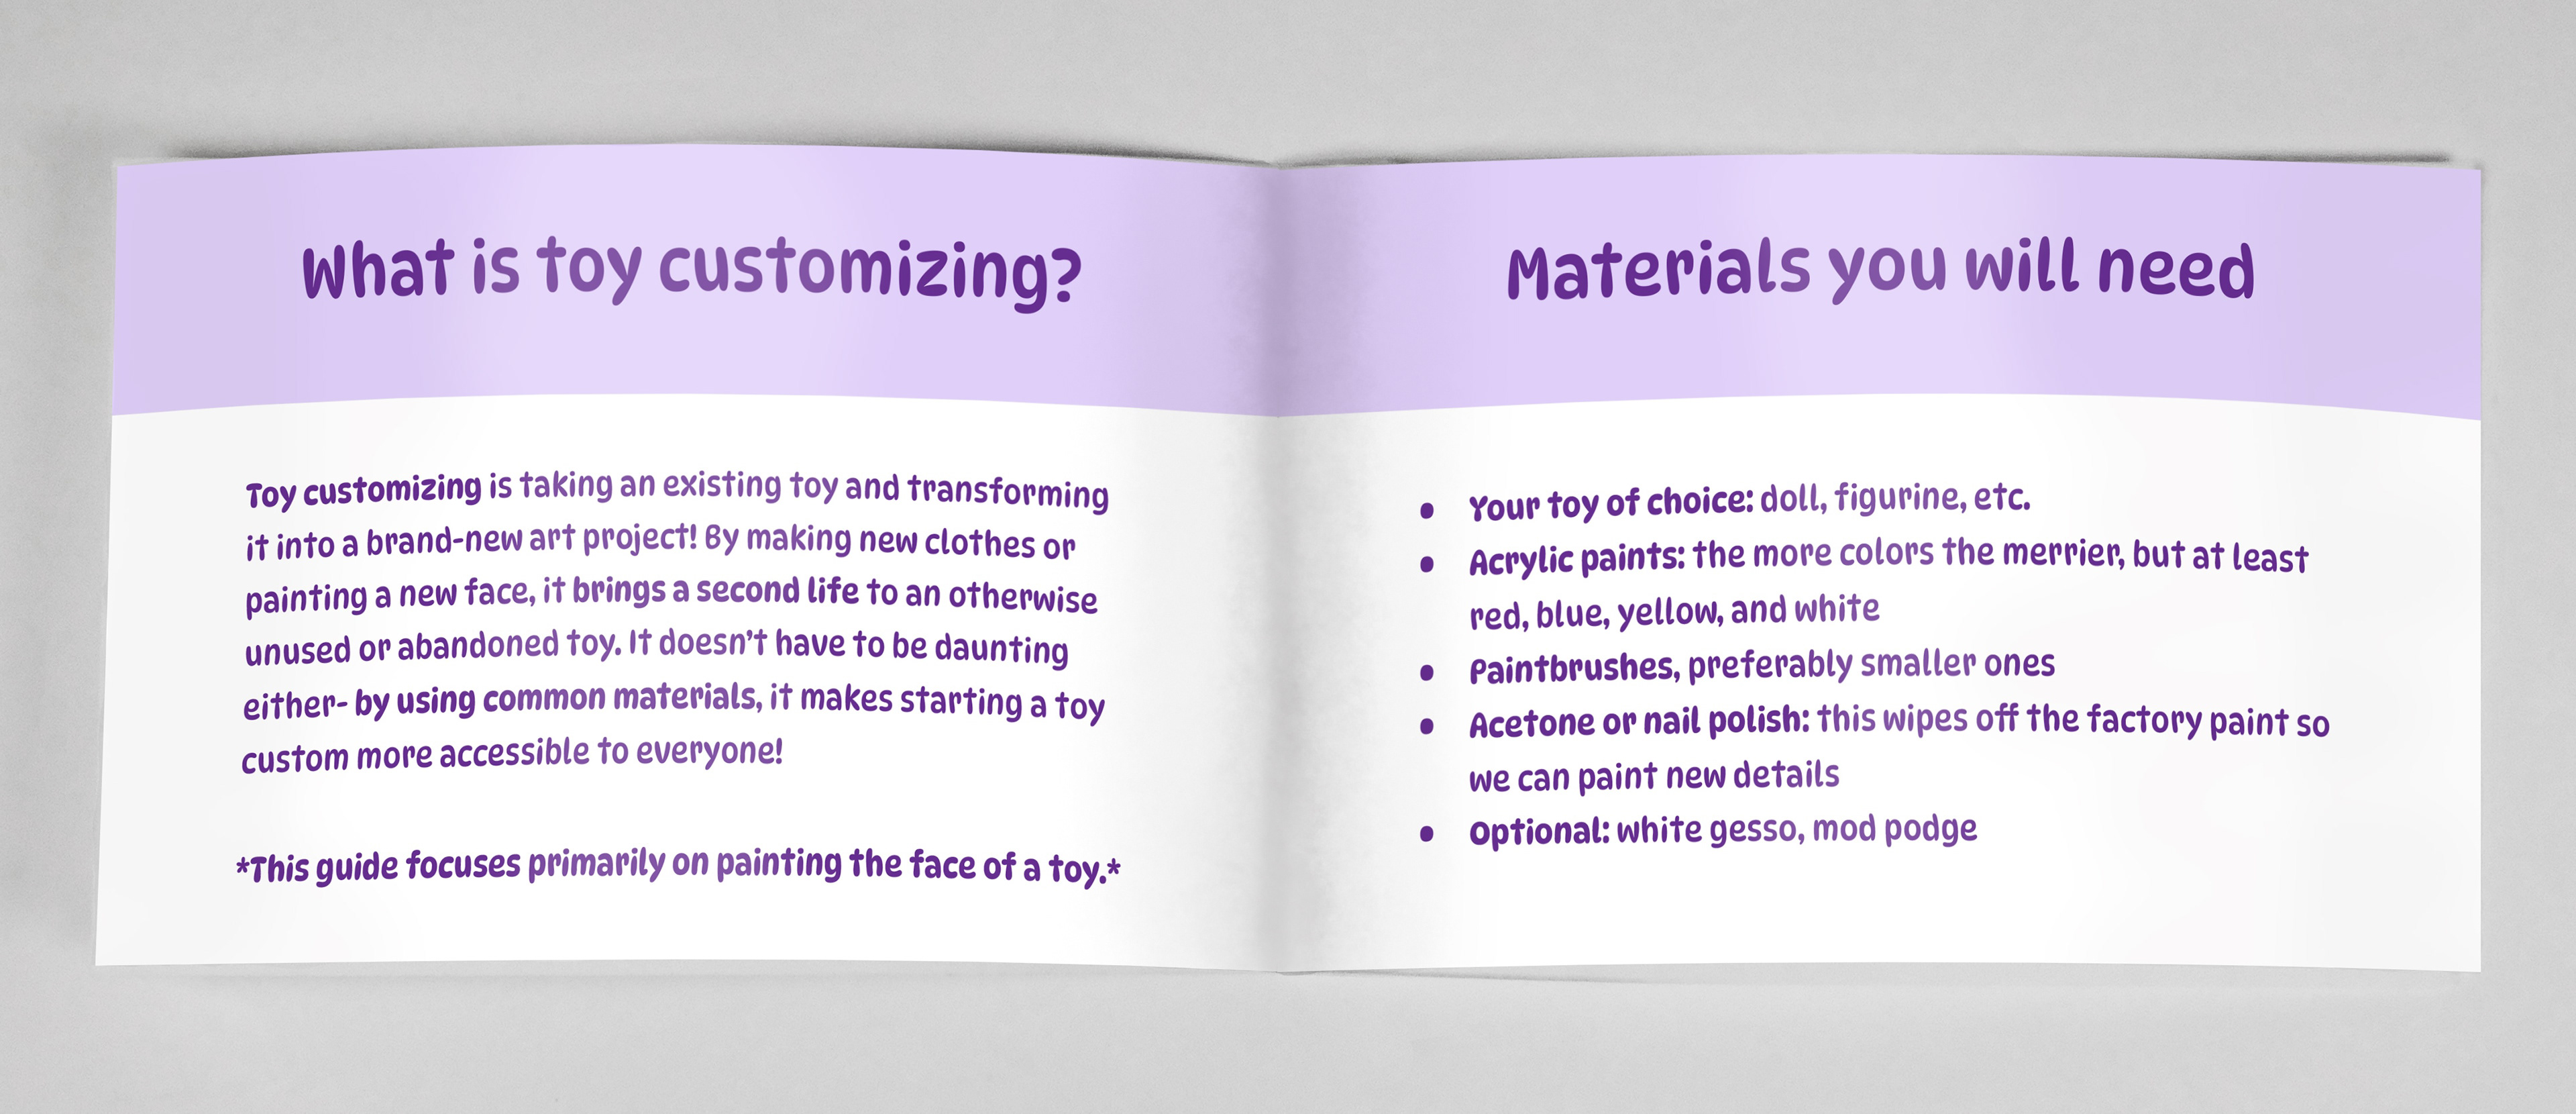
A sample of a page spread inside the guidebook. I wrote many detailed, step-by-step instructions on how to make a toy custom, and I want to make the entire guidebook.

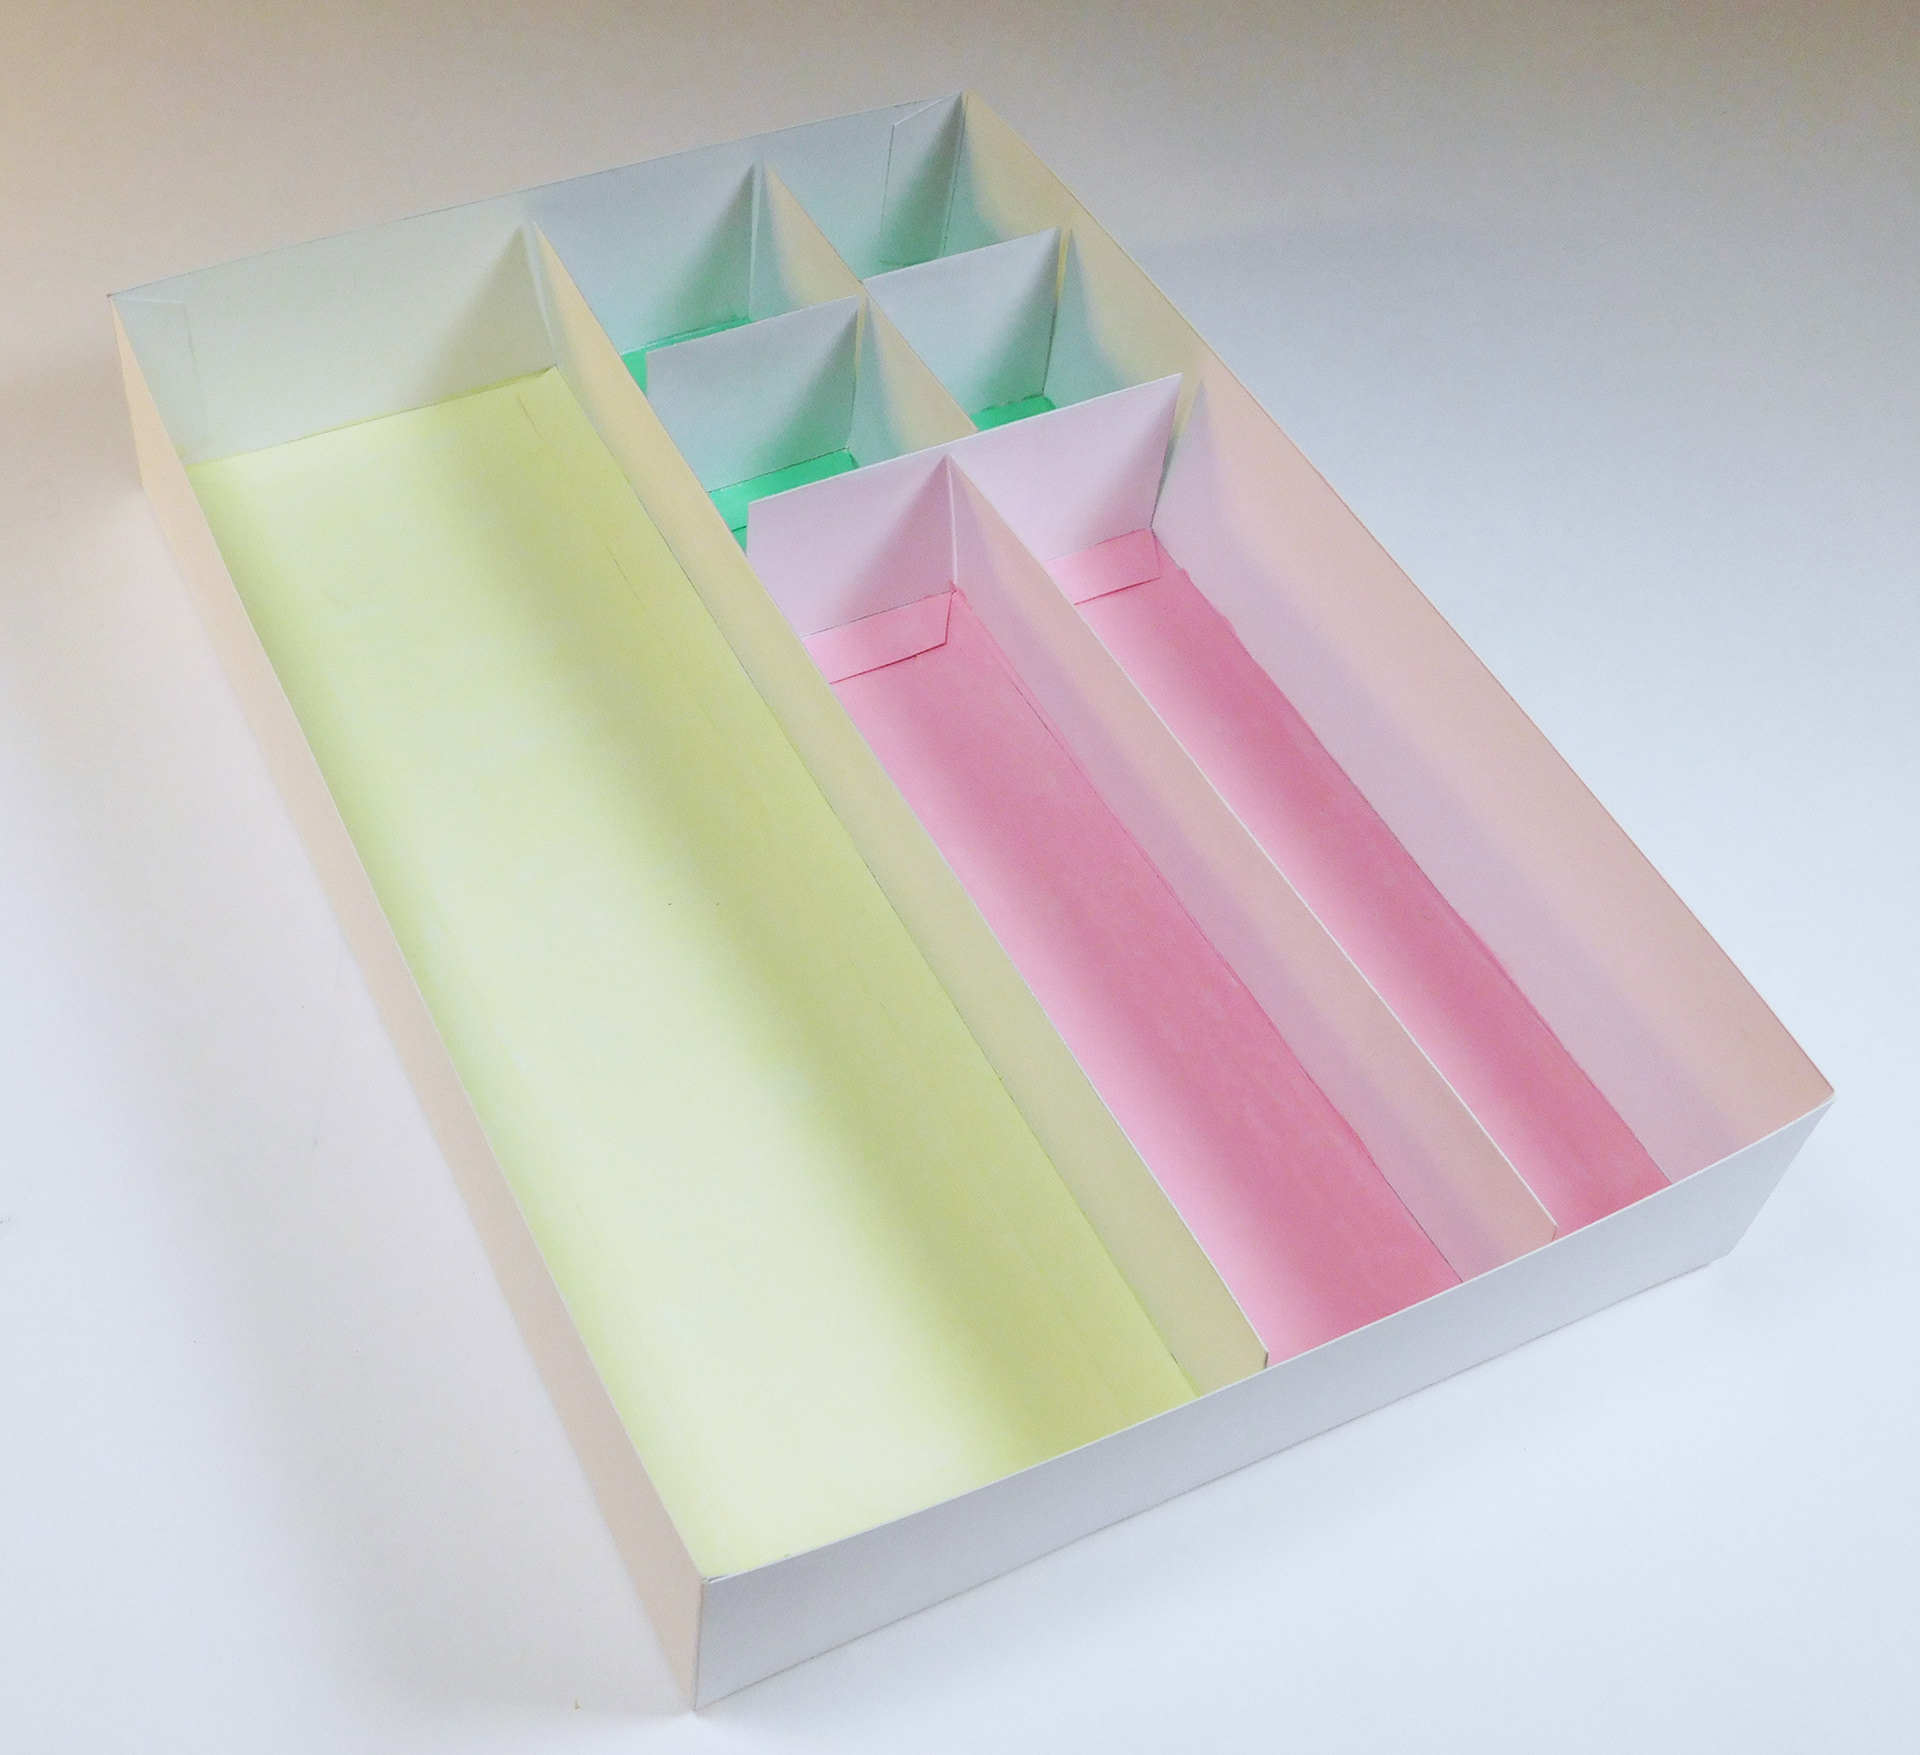
The inside of the box. The dividers have been adjusted from the first two prototypes: instead of securing on the sides of the box, they secure on the bottom of the box. On the left: a sample of how someone could use the box. It does not come with the supplies; users are encouraged to collect their own supplies to put in the box.
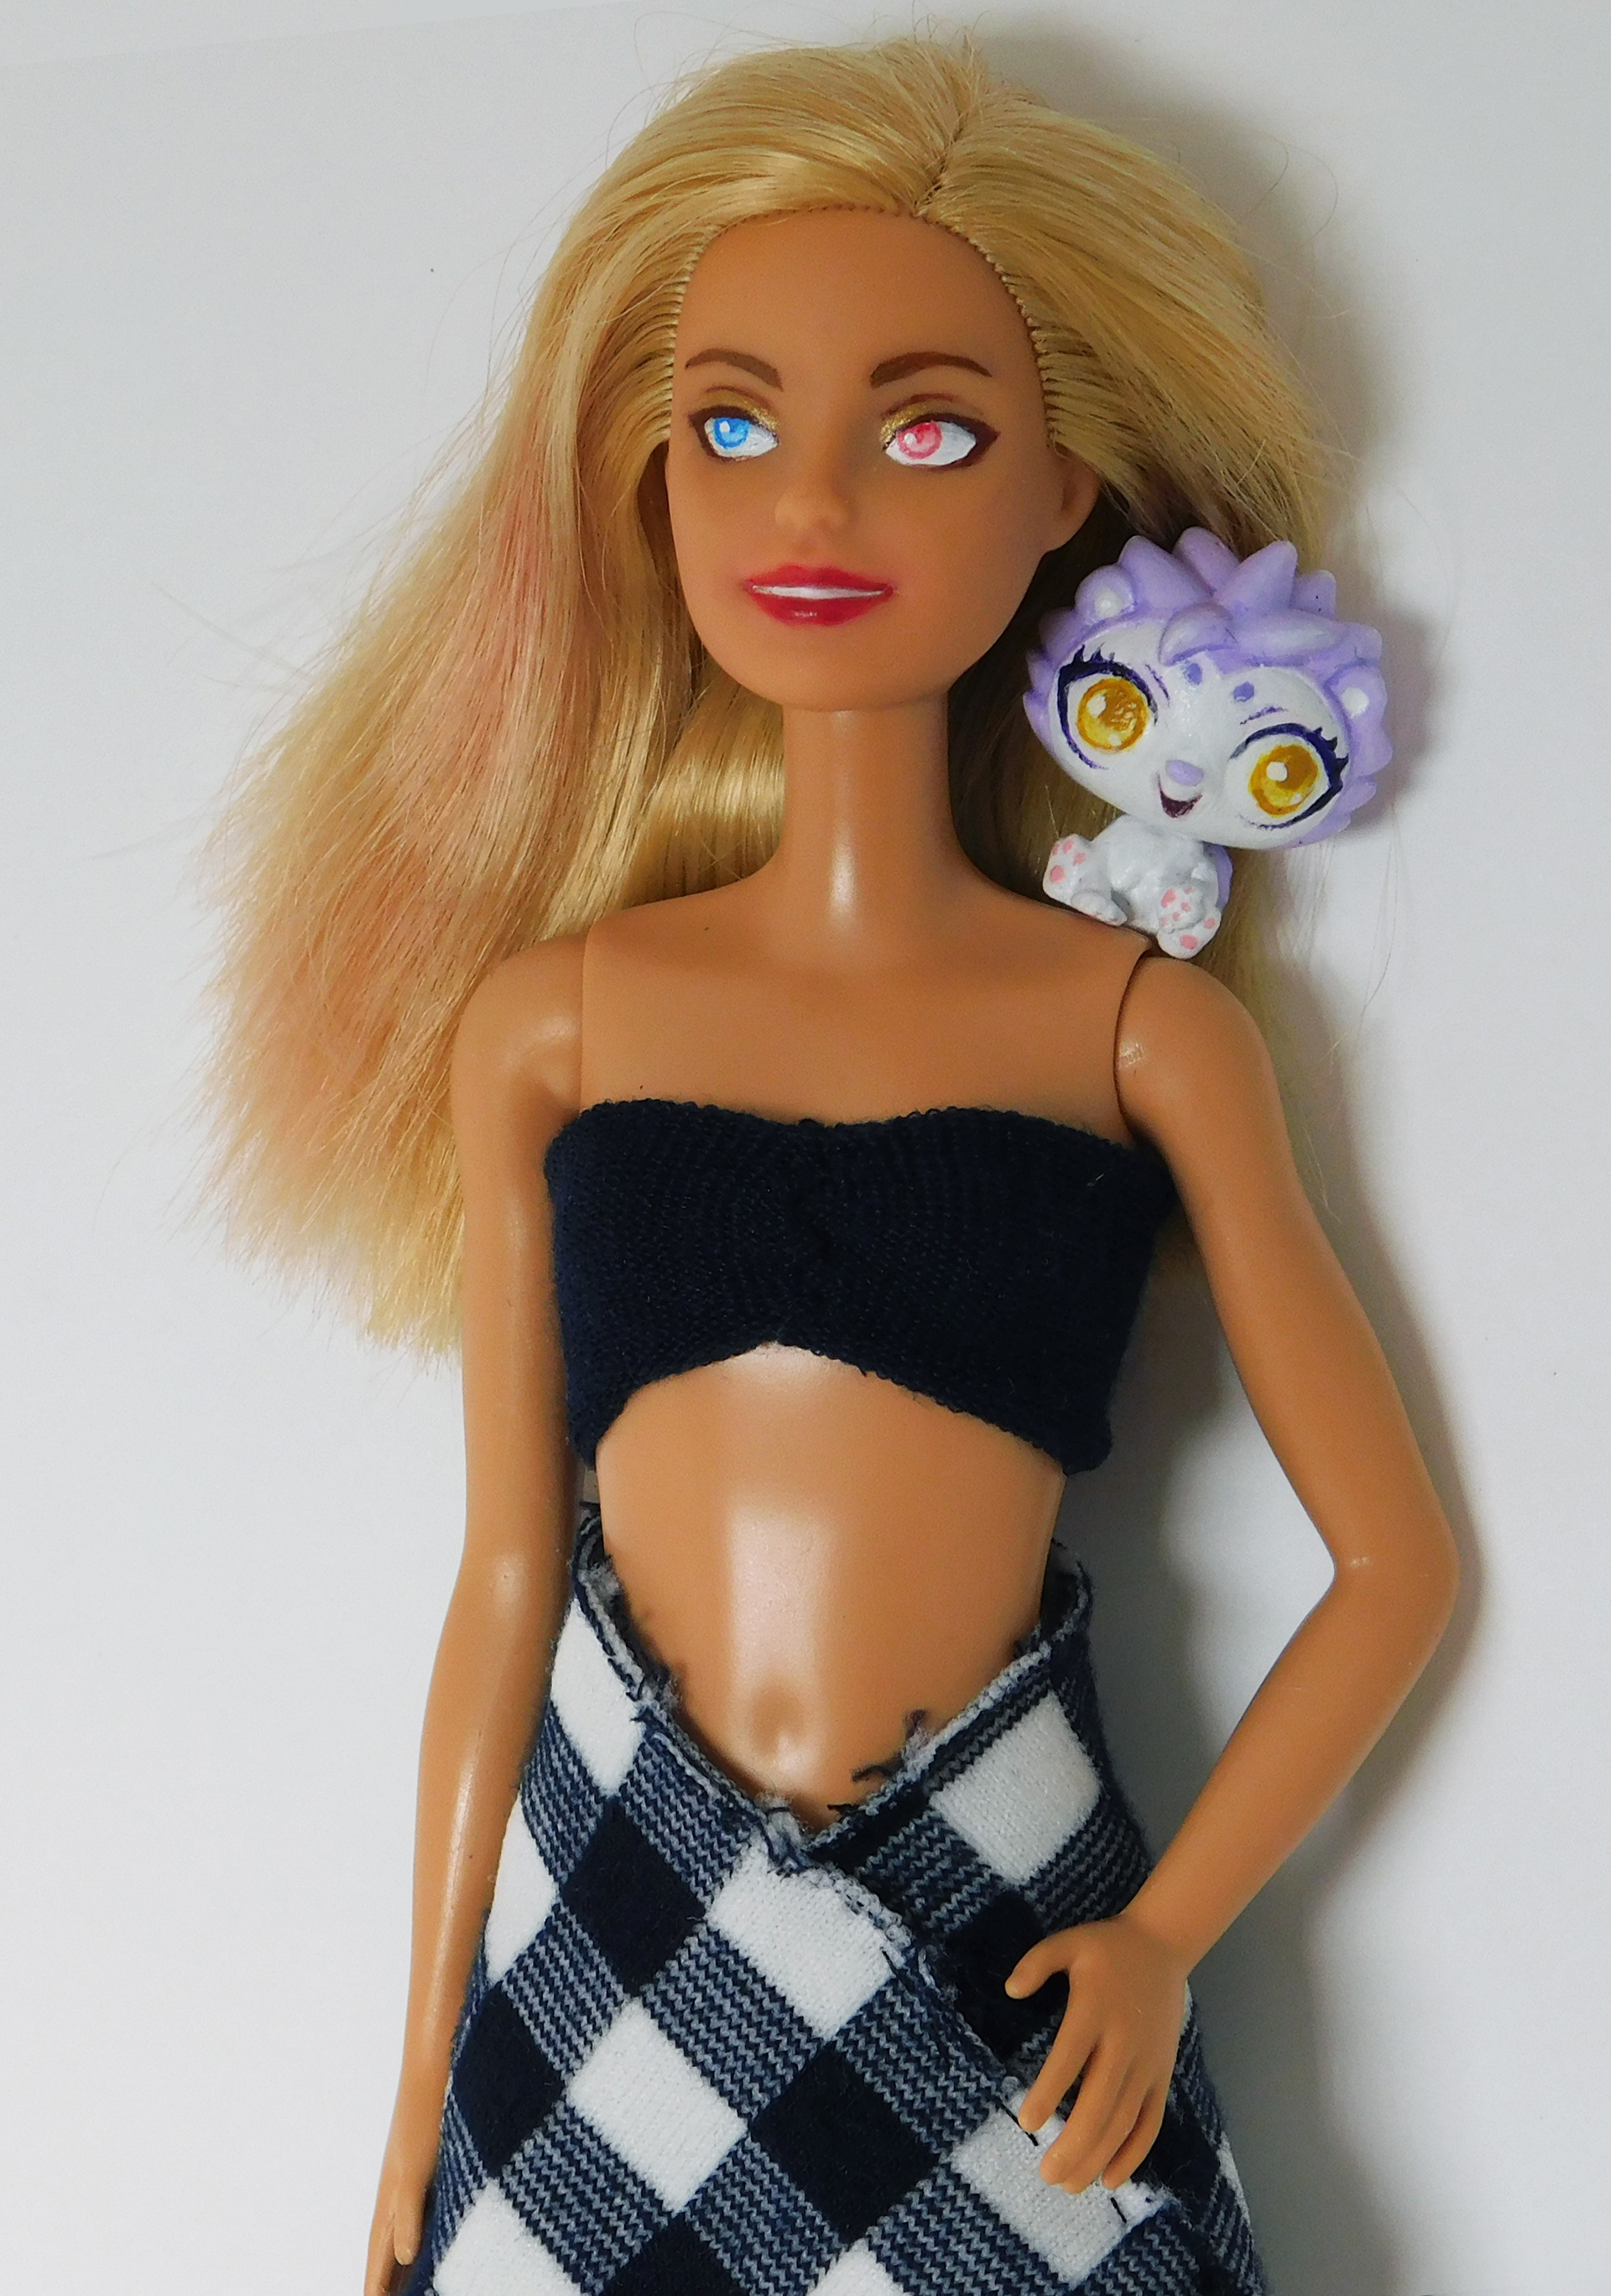
The custom cuties that inspired this project. I bought a Barbie doll at a thrift store specifically to use for the product photos. I simply followed the steps that I wrote to paint on her new face. She also didn't come with any clothes, so I had to sew her a cute little outfit. I'm no seamster, but I'm very happy with how it turned out. This outfit actually used to be a sock!